A Better SQL Server Experience on OSX
Anyone following my other blog posts will know I'm a .NET guy who works with Linux (we do exist) and so like a lot of *nix guys I work with a Mac. I love my Macbook but I still need to enter the Windows world from time to time and this is where I've experienced a bit of pain. I use Parallels which I have to say is excellent and does about as good a job as can be expected to make switching between OSX and Windows as smooth as possible. However, trying to call SQL Server from my Mac and trying to use SSMS was where I had my biggest pain point. I've documented what I did to make the experience much easier and hopefully this will help out others too.
Dark Theme
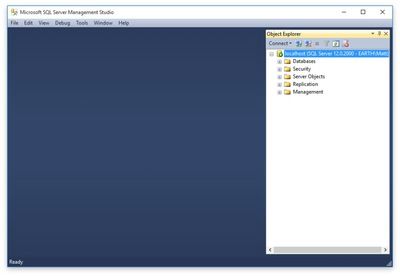
You can skip this step if you wish but the first thing I always do after installing SSMS is change the default theme to a darker theme. There's some helpful info on how to do this here but it can be a bit of a pain. Fortunately the same page has a dark theme you can download directly here which you can then import by clicking the Tools link at the top of SSMS.
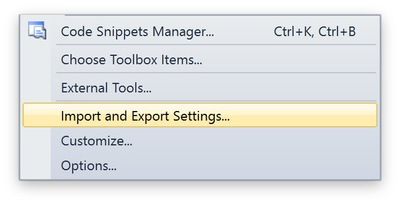
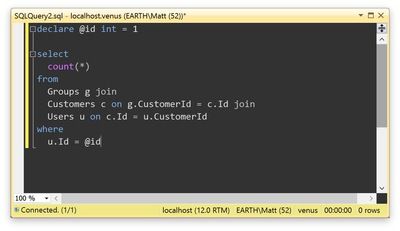
This will then give you a theme the same as the one shown below which I find a lot easier on the eye.
Allow Remote Connections
This is something any seasoned developer who's worked with SQL Server will have done at some point and you'll need to do the same again with your Windows virtual machine.
First enable TCP/IP in SQL Server Configuration Manager.
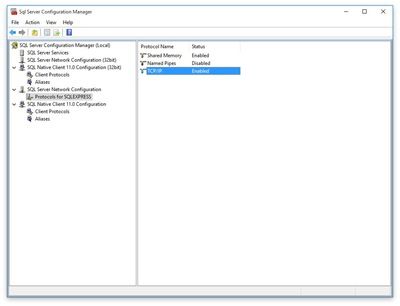
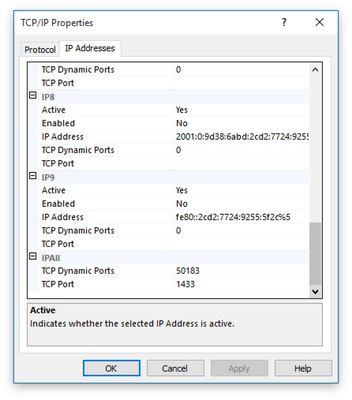
Then right-click and select the properties, select the IP Addresses tab and enter 1433 in the TCP Port field under the IPAll section at the bottom.
Finally for the remote connection add a rule to the Windows Firewall. Fire up the program then under Inbound Rules right-click and select New Rule then click next.
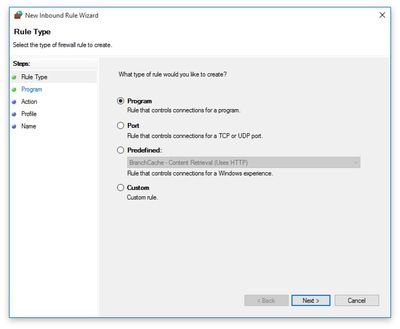
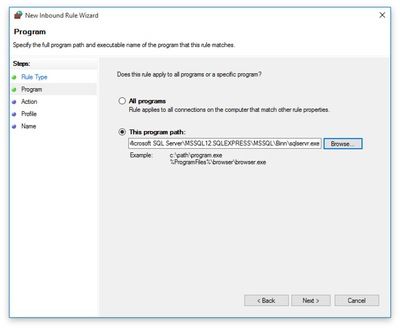
Then enter the file location for the sqlserver.exe program in the "This program path field" as shown below and then click Next.
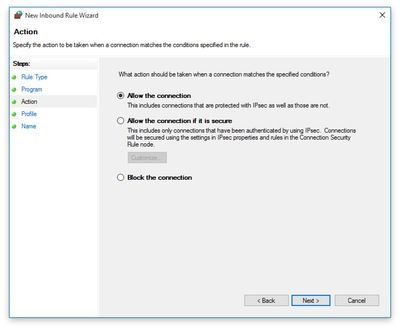
On the Action section click Next.
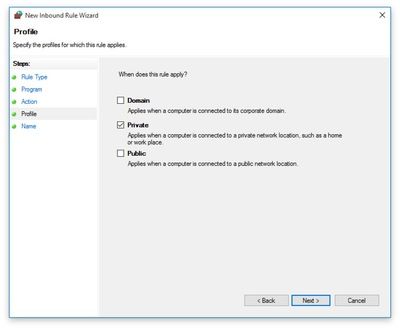
On the Profile section only tick Private and click Next.
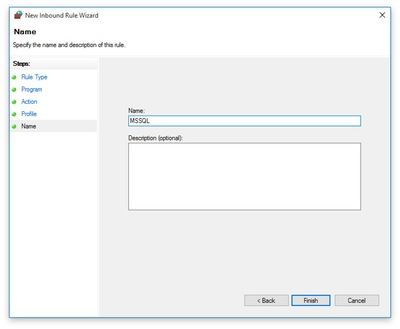
Finally give your rule a name - MSSQL is as good a name as any - and then click Finish.
Finally double-click your newly created rule then select the Protocols and Ports tab.
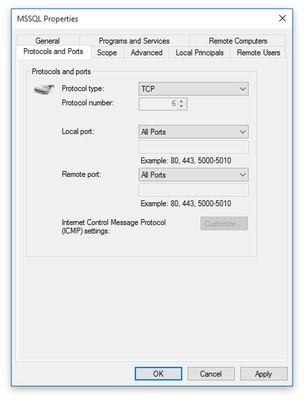
Change the Local port from All Ports to 1433.
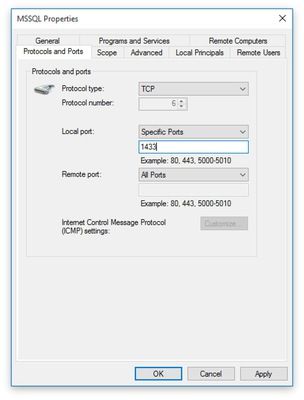
Click OK. You will now be able to connect to SQL Server from your host OSX machine.
Password File
One really annoying thing with SSMS is its inability to retain passwords after you click the Remember Password checkbox.
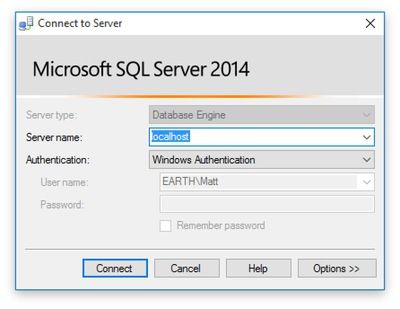
If you're using SSMS many times throughout the day hunting for your passwords and then entering them soon hits your productivity level. Luckily there is a way round this. The trick is to save a copy of the password file then copy it before you fire up SSMS. First you need to create the file to copy so delete the existing file before we create a new file with the preferred login information.
C:\Users\Matt\AppData\Roaming\Microsoft\SQL Server Management Studio\12.0\SqlStudio.binThen fire up SSMS and connect to all the servers you want to be associated with password. One tip is to note the servers you connect to will appear in the reverse order. So the server you want to connect to most frequently you'll want to connect to last when creating the file. Once completed connecting to your servers make a copy of the file and save it as SqlStudio.bin.bak as shown below.
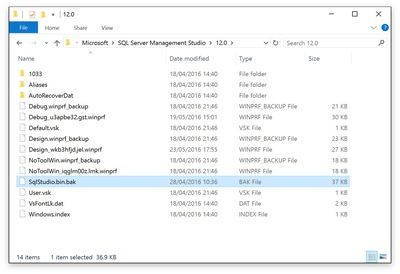
Now you need to create a command file for starting SSMS that copies the SqlStudio.bin.bak file ready for SSMS to use. So create a text file called SSMS-Open.cmd and past the following commands then save the file.
cd "C:\Users\Matt\AppData\Roaming\Microsoft\SQL Server Management Studio\12.0"
copy SqlStudio.bin.bak SqlStudio.bin /Y
start ssms.exe
Now when you double-click on SSMS-Open.cmd SSMS should start using the SqlStudio.bin.bak file created in the previous step (if it doesn't work you may need to open the file as an Administrator but we're going to be coverting that in a minute anyhow).
Manifest File
Another serious pain with SSMS if you're using a retina display is its rendering. It sucks big time and for some tasks it is quite literally unusable as shown below.
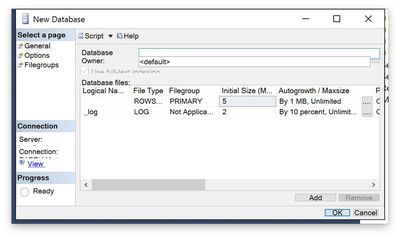
Thankfully I found a super helpful way round this here. You need to create a manifest file in the same directory the application exe uses which forces your application to use Vista style bitmap scaling. The file format needs to be [application name].exe.manifest with [application name] being the name of your exe.
You have a couple of ways of going about this. You can just create a file Sssm.exe.manifest and leave it in the exe directory or you can copy a file on the fly and then delete it when the application is loaded in case you want to load SSMS using your retina display (which does look nicer even though you won't be able to perform some tasks). I went with the latter as often I'm just using SSMS for querying and I prefer the retina rendering if possible.
In either case you'll need to create the following registry key.
[HKEY_LOCAL_MACHINE\SOFTWARE\Microsoft\Windows\CurrentVersion\SideBySide]
"PreferExternalManifest"=dword:00000001
Then create an app.exe.manifest file to copy. The location doesn't matter. The contents of the file are below.
<?xml version="1.0" encoding="UTF-8" standalone="yes"?>
<assembly xmlns="urn:schemas-microsoft-com:asm.v1" manifestVersion="1.0" xmlns:asmv3="urn:schemas-microsoft-com:asm.v3">
  <dependency>
    <dependentAssembly>
      <assemblyIdentity type="win32" name="Microsoft.Windows.Common-Controls" version="6.0.0.0" processorArchitecture="*" publicKeyToken="6595b64144ccf1df" language="*" />
    </dependentAssembly>
  </dependency>
  <dependency>
    <dependentAssembly>
      <assemblyIdentity type="win32" name="Microsoft.VC90.CRT" version="9.0.21022.8" processorArchitecture="amd64" publicKeyToken="1fc8b3b9a1e18e3b" />
    </dependentAssembly>
  </dependency>
  <trustInfo xmlns="urn:schemas-microsoft-com:asm.v3">
    <security>
      <requestedPrivileges>
        <requestedExecutionLevel level="asInvoker" uiAccess="false" />
      </requestedPrivileges>
    </security>
  </trustInfo>
  <asmv3:application>
    <asmv3:windowsSettings xmlns="http://schemas.microsoft.com/SMI/2005/WindowsSettings">
      <ms_windowsSettings:dpiAware xmlns:ms_windowsSettings="http://schemas.microsoft.com/SMI/2005/WindowsSettings">false</ms_windowsSettings:dpiAware>
    </asmv3:windowsSettings>
  </asmv3:application>
</assembly>
Next create a text file called SSMS-Open-With-Manifest.cmd and copy paste the code below. Note the second line - this needs to point to the app.exe.manifest file you created in the previous step.
cd "C:\Program Files (x86)\Microsoft SQL Server\120\Tools\Binn\ManagementStudio"
copy \\Mac\Home\Dev\scripts\windows\app.exe.manifest Ssms.exe.manifest /Y
cd "C:\Users\Matt\AppData\Roaming\Microsoft\SQL Server Management Studio\12.0"
copy SqlStudio.bin.bak SqlStudio.bin /Y
start ssms.exe
cd "C:\Program Files (x86)\Microsoft SQL Server\120\Tools\Binn\ManagementStudio"
del Ssms.exe.manifest
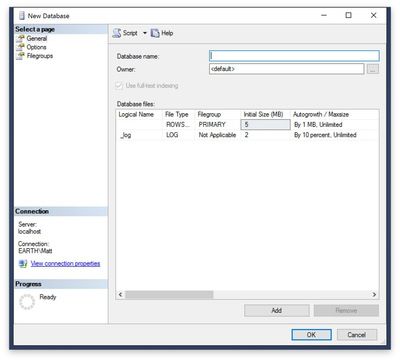
If you've been following along you should have two files for opening SSMS. When you click on SSMS-Open.cmd it will open SSMS normally and when you click on SSMS-Open-With-Manifest.cmd it will open using Vista style rendering as shown below.
Now if you try to create a new database you'll see something more user friendly unlike the screenshot in the first step of this section.
Toolbar Shortcut
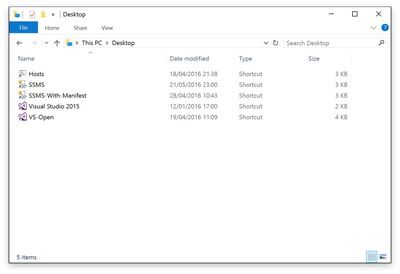
As stated earlier you may need to open the command files under Administrator but this can be done using a shortcut so you can just click and open. First from Windows create a shortcut on your shared desktop
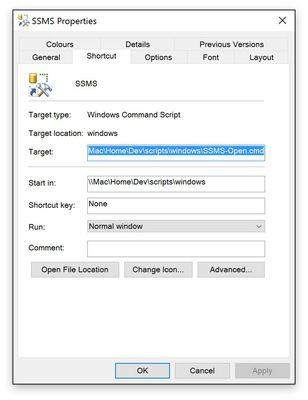
Make sure the Target and Start in fields are correctly filled out.
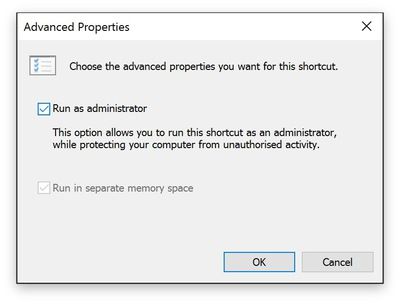
Then click the Advanced button and make sure Run as administrator is ticked (this will fix any issues referred to earlier where the Windows command may complain copying the SqlStudio.bin.bak file).
The default shortcut command is a bit ugly and it looks nicer to have the SSMS icon so to change that click the Change Icon button on the properties.
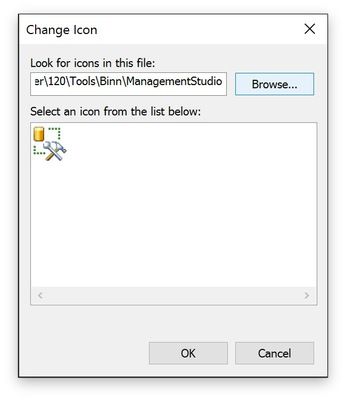
Browse to the following file then click OK to set the icon.
C:\Program Files (x86)\Microsoft SQL Server\120\Tools\Binn\ManagementStudio\ssms.ico
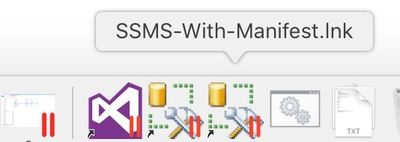
Finally from OSX open Finder then browser to the newly created shortcut files and drag them to your toolbar.
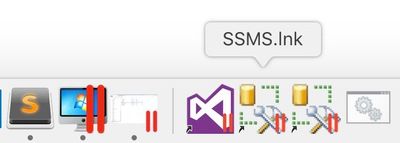
Now if you click on either file you can open SSMS directly with your saved passwords and rendering however you choose in Vista mode or using your retina settings.
That's it. I've picked up these tips over the years and used them when I was still using Windows so I hope they've been helpful. Please leave any comments below. Thanks :-)