Real World ASP.NET Core Linux Example
Anyone who's been reading my stuff knows one of my motivations is to provide documentation that is otherwise lacking for getting .NET to run on Linux. Part of the problem historically has been Microsoft only officially supporting Windows which has meant tutorials, Stack Overflow answers, user forums et al have been dominated by Windows and its tools (particularly Visual Studio). But in this brave new world of MS and Linux that is all about to change right? Well I hope so but we still have a way to go.
.NET Installation
Anyway, my first port of call was the official MS docs here which got me up and running but like a lot of the .NET Linux tutorials it left a few things out which will guarantee to leave anyone not familar with Linux scratching their head.
My previous tutorial for Mono here showed you how to get multiple ASP.NET sites up and running under a service and that's what I'm going to show you here.
I'll skip the first stage - installing Linux - as there's a short tutorial I did before here which shows you how to get Ubuntu Server installed along with Mono (not necessary for this tutorial). Make sure to install the firewall (and ssh server so you can login remotely!) and vim which I use as my Linux text editor (and is used throughout the rest of this tutorial).
Once your server is up and running sign in and follow the steps here for installing dotnet itself. First you'll need to update the source list and install a key. Depending on your version the steps may vary slightly but they're all straightforward. I'm using version 14.04 so the steps I executed were the following.
sudo sh -c 'echo "deb [arch=amd64] https://apt-mo.trafficmanager.net/repos/dotnet-release/ trusty main" > /etc/apt/sources.list.d/dotnetdev.list'
sudo apt-key adv --keyserver apt-mo.trafficmanager.net --recv-keys 417A0893
sudo apt-get update
Then execute the following to install the runtime.
sudo apt-get install dotnet-dev-1.0.0-preview2-003121
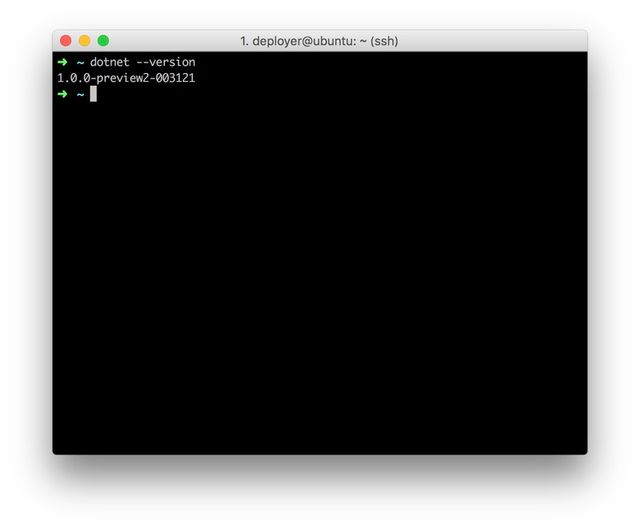
That's it for the installation. You can run the example as shown on the download page but it isn't necessary. Just run dotnet --version as a quick check and you'll see the following.
Web Server Setup
Next install the webserver. Run the following.
sudo apt-get install nginx
If you haven't already, enable the firewal and add following rules.
sudo ufw enable
sudo ufw allow 22/tcp
sudo ufw allow 80/tcp
Website Creation
Now it's time to set up a site. Yeoman has some really good ASP.NET templates but for this example will go with something even more bare bones (I always prefer the absolute minimum when I'm trying out a new framework for the first time).
We'll stay on our Linux server for this task - you would normally upload the files but that's not necessary to demonstrate for this tutorial as we'll still go through the process of packaging the application. Create a directory for the new site and then navigate to the directory itself.
mkdir aspnetcore
cd aspnetcore
touch Program.cs Startup.cs project.json appsettings.json
This will have created some empty files we'll use to create our simple website. This will be a very basic 'Hello World' site. First copy and paste the following into the Program.cs file.
using System.IO;
using Microsoft.AspNetCore.Hosting;
using Microsoft.Extensions.Configuration;

public class Program
{
  public static void Main(string[] args)
  {
    var builder = new ConfigurationBuilder()
      .SetBasePath(Directory.GetCurrentDirectory())
      .AddJsonFile("appsettings.json", optional: true)
      .Build();

    var host = new WebHostBuilder()
      .UseKestrel()
      .UseConfiguration(builder)
      .UseContentRoot(Directory.GetCurrentDirectory())
      .UseStartup<Startup>()
      .Build();

    host.Run();

  }

}
As you can see, in ASP.NET Core a website is invoked the same way as a console application! Next we need to create the Startup class referenced in the .UseStartup<Startup>() line near the bottom so copy and paste the following into the Startup.cs file.
using Microsoft.AspNetCore.Builder;
using Microsoft.AspNetCore.Hosting;
using Microsoft.AspNetCore.Http;

public class Startup
{
  public void Configure(IApplicationBuilder app)
  {
    app.Run(context =>
    {
      return context.Response.WriteAsync("Hello World!");
    });
  }
}
Website Configuration
Next copy and paste the following into the project.json file. This is a pretty bare bones settings file in terms of references.
{
  "version": "1.0.0-*",
  "buildOptions": {
    "debugType": "portable",
    "emitEntryPoint": true
  },
  "dependencies": {
    "Microsoft.AspNetCore.Mvc": "1.0.0",
    "Microsoft.AspNetCore.Server.Kestrel": "1.0.0",
    "Microsoft.Extensions.Configuration.Json": "1.0.0",
    "Microsoft.Extensions.Options.ConfigurationExtensions": "1.0.0"
  },
  "frameworks": {
    "netcoreapp1.0": {
      "dependencies": {
        "Microsoft.NETCore.App": {
          "type": "platform",
          "version": "1.0.0"
        },
        "Microsoft.AspNetCore.Server.Kestrel": "1.0.0"
      },
      "imports": "dnxcore50"
    }
  },
  "publishOptions": {
    "include": [
      "wwwroot",
      "Views",
      "appsettings.json"
    ]
  }
}
Finally copy and paste the following into the appsettings.json file (if you look at the project.json file you'll see appsettings.json is referenced in the publishOptions section).
{
  "server.urls": "http://localhost:5001"
}
This appsettings.json file is important and was a crucial part missing from the official documentation. ASP.NET Core runs on the default port of 5000 but if you're hosting more than one site - a very 'real world' scenario - then you need to be able to specify a different port for each site (of course to the outside world everything will appear on port 80 but we do some reverse proxying with nginx which we'll come to in a minute).
.NET Publishing
Once you've created all your files run the following.
dotnet restore
This will grab the necessary packages referenced in the project.json file for you to be able to run your site. Once this is done you can check your site is working by running the following command.
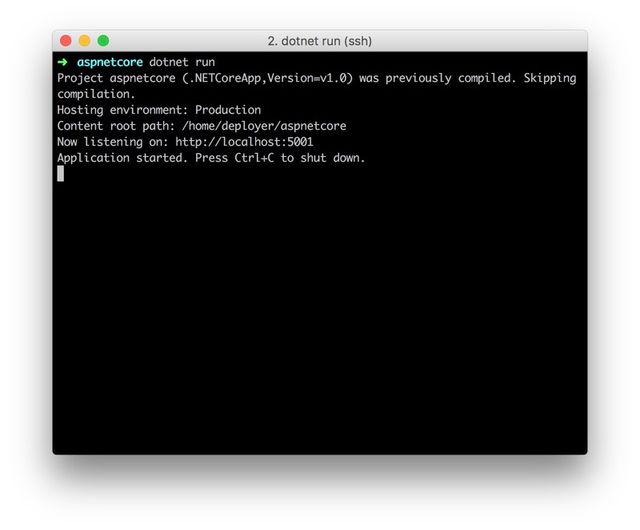
dotnet run
You should see something like the following which shows the program is listening on port 5001.
Press Ctrl+C to terminate the command as we're not quite ready to view the site in a browser yet. We need to package the application so run the following command.
dotnet publish
Again, this is where the official docs lack a bit of an explanation as it doesn't tell you where the published files are but if you look in your terminal you'll see it gives you a location.
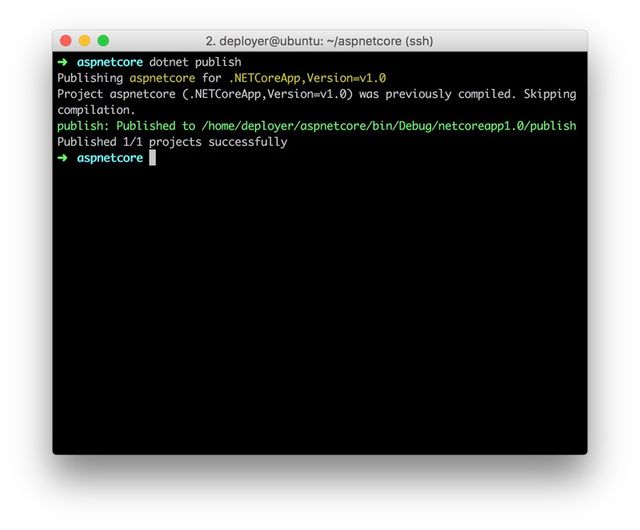
In my case it's the following path.
/home/deployer/aspnetcore/bin/Debug/netcoreapp1.0/publish
I've been using Linux for a couple of years now but I'm still finding my way round as there are varying opinions on where to put your website files but for this I'm going to (mainly) follow the official documentation and put them in the var directory. I'm going to add a www subfolder as I've seen that used a few times. You'll need to create it if it doesn't exist (using sudo). Afterwards copy the files in the project directory to a site folder.
sudo mkdir /var/www
sudo cp -r /home/deployer/aspnetcore/bin/Debug/netcoreapp1.0/publish /var/www/aspnetcore
Web Server Configuration
Our site is now ready to run but it can't be viewed by the outside world until we've configured nginx. This is where the offical documentation is a bit unhelpful as it tells you to edit the default config file but this only works if you have one site on your server. I've noticed a lot of web tutorials for other languages do this and it confused me at first as when you go to the nginx website you can get a bit overwhelemed by documentation. In fact some people recommend deleting the default file as it's not really needed and you instead should create an nginx config file for each website on your server which you do here with the following
sudo vim /etc/nginx/sites-available/aspnetcore
Next copy and paste the following adjusting the server_name property to whatever your domain address is. I'm using a local VM for my example here hence the the top level domain as opposed to something more familiar like coderscoffeehouse.com but if you're using a publicly available server then you'll need to edit the DNS settings in your hosting provider's configuration settings.
server {
        listen 80;
        server_name aspnetcore.ubuntu;

        location / {
                proxy_pass http://localhost:5001;
                proxy_http_version 1.1;
                proxy_set_header Upgrade $http_upgrade;
                proxy_set_header Connection keep-alive;
                proxy_set_header Host $host;
                proxy_cache_bypass $http_upgrade;
        }
}
Save the file with !wq. Then create a symlink in the nginx sites-enabled directory (otherwise it will just be ignored).
sudo ln -s /etc/nginx/sites-available/aspnetcore aspnetcore
The site is now ready to viewed from a browser which we can test by starting the nginx service and the dotnet app by running the following.
sudo service nginx restart
dotnet /var/www/aspnetcore/aspnetcore.dll
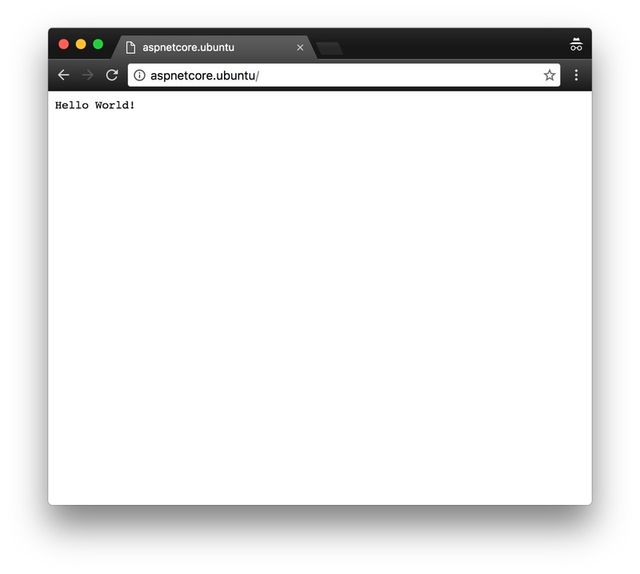
If you now browse to the address you used for the server_name in the nginx aspnetcore file you should see the following.
Automate Startup
Obviously from a practical point of view you can't run the application from the command line everytime you want your site up so we need to create a background process to do this. The offical documentation uses supervisor which I hadn't heard of but it seems to do the job. Press Ctrl+C to stop the current dotnet command (if necessary) and then run the following to install supervisor.
sudo apt-get install supervisor
Then create a supervisor config file the site.
sudo vim /etc/supervisor/conf.d/aspnetcore.conf
Then paste the following.
[program:aspnetcore]
command=/usr/bin/dotnet /var/www/aspnetcore/aspnetcore.dll
directory=/var/www/aspnetcore
autostart=true
autorestart=true
stderr_logfile=/var/log/aspnetcore.err.log
stdout_logfile=/var/log/aspnetcore.out.log
environment=ASPNETCORE_ENVIRONMENT=Production
user=www-data
stopsignal=INT
The important lines here are the second and third which point to the correct locations for our site. Run !wq and save the file then run the following to the start the necessary services.
sudo service supervisor restart
sudo service nginx restart
If you open a browser you should now see your site up and running. You can restart the server and the site will automatically start.
Multiple Site Scenario
That's great but in the real world we might well have multiple ASP.NET sites on our server. Again the doc site didn't really give the necessary details for this but we've already covered what's necessary for this. To quickly create a duplicate site with a slight change navigate to the original aspnetcore website with the code files and go into the Startup.cs file (your original location might be different).
cd ~/aspnetcore
vim Startup.cs
Then and change Hello World! to Hello World!! and save with !wq. Next edit the appsettings.json file.
vim appsettings.json
Change the value of the server.urls port from 5001 to 5002 and then type !wq to save the file.
Now run the following to create a new package.
dotnet publish
Now make copies of the previous files we needed to get our site running. You don't have to stick with what I've done below but to keep things simple I've just created the same files before apart from the 2 appended at the end.
sudo cp -r ~/aspnetcore/bin/Debug/netcoreapp1.0/publish /var/www/aspnetcore2
sudo cp /etc/nginx/sites-available/aspnetcore /etc/nginx/sites-available/aspnetcore2
sudo cp /etc/supervisor/conf.d/aspnetcore.conf /etc/supervisor/conf.d/aspnetcore2.conf
sudo ln -s /etc/nginx/sites-available/aspnetcore2 aspnetcore2
Open up the newly created nginx site configuration file.
sudo vim /etc/nginx/sites-available/aspnetcore2
Change the value of the server_name to the relevant another domain name (I've changed aspnetcore.ubuntu to aspnetcore2.ubuntu for this tutorial). Then change the proxypass port from 5001 to 5002 and type !wq to save the file.
server {
        listen 80;
        server_name aspnetcore2.ubuntu;

        location / {
                proxy_pass http://localhost:5002;
                proxy_http_version 1.1;
                proxy_set_header Upgrade $http_upgrade;
                proxy_set_header Connection keep-alive;
                proxy_set_header Host $host;
                proxy_cache_bypass $http_upgrade;
        }
}
Open the supservisor configuration file we created a few moments ago.
sudo vim /etc/supervisor/conf.d/aspnetcore2.conf
Change the second part of the command line from /var/www/aspnetcore/aspnetcore.dll to /var/www/aspnetcore2/aspnetcore.dll plus the other changes show below and then type !wq to save the file.
[program:aspnetcore2]
command=/usr/bin/dotnet /var/www/aspnetcore2/aspnetcore.dll
directory=/var/www/aspnetcore
autostart=true
autorestart=true
stderr_logfile=/var/log/aspnetcore2.err.log
stdout_logfile=/var/log/aspnetcore2.out.log
environment=ASPNETCORE_ENVIRONMENT=Production
user=www-data
stopsignal=INT
Restart the necessary services.
sudo service supervisor restart
sudo service nginx restart
Check you can still browse to your first website successfully.

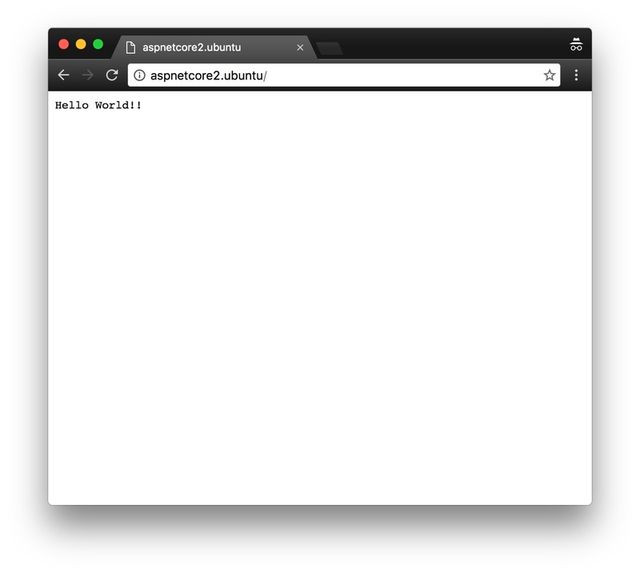
And then you can browse to the second website successfully as well.
Conclusion
This is by no means an exhaustive tutorial but I think it provides enough information to get a production site running (in fact I will be doing just that for an internal API I have planned imminently). Please leave any comments below.
Thanks :-)
http://www.jeffreyfritz.com/2016/08/should-i-use-asp-net-core-or-mvc-5/
https://docs.asp.net/en/latest/publishing/linuxproduction.html
http://benfoster.io/blog/how-to-configure-kestrel-urls-in-aspnet-core-rc2
http://stackoverflow.com/questions/36001695/setting-base-path-using-configurationbuilder