Headless Front End Testing on Linux using F# and Canopy
I've been following F# for a while but it's only recently started appearing in my workflow for serious work. I'm not a good F# programmer at all but I'm confident enough to use it in small scripts and I think it does a pretty good job here. However, I recently discovered the front end testing framework Canopy and this provides an excellent opening for anyone looking for a low level entry to the F# world.
In the past when I've bothered to test the front end in a .NET project I've used FluentAutomation. It's essentially a wrapper for Selenium - the same as Canopy and nearly all the front end testing frameworks - but it hasn't been updated in a long time and I always found coding in C# to test front end incredibly verbose. This is where Canopy shines, it has a really easy to use DSL that works using the query selectors anyone who's done any front end work will be familiar with.
"#welcome" == "Welcome"
I won't go into detail as the Canopy site has some good introduction videos which contain enough to get you going but the snippet above gives you an idea of how simple it is.
The reason for this post is because I soon hit a problem when I wanted to automate my tests. I needed them to be headless but I was having problems with the PhantomJS driver. If you follow the thread in the link you'll see I tried some workarounds but it seems like the issue is PhantomJS rather than Canopy. So it was suggested I should try running Chrome in headless mode which is what we're going to do here.
The first thing you'll need to do is setup your Linux server and install Mono. I've already written a brief tutorial on that here. I suggest following the instructions on the Mono site (which I've documented) and not just following what it says on the main F# site as there are some steps missing.
Once that's done you'll need to install F# and nuget.
sudo apt-get update
sudo apt-get install fsharp
sudo apt-get install nuget
Then install unzip.
sudo apt-get install unzip
Download the Chrome driver and unzip the contents (note that this file needs to be in the root of your project).
wget https://chromedriver.storage.googleapis.com/2.26/chromedriver_linux64.zip
unzip chromedriver_linux64.zip
Install Chrome.
wget -q -O - https://dl-ssl.google.com/linux/linux_signing_key.pub | sudo apt-key add -
sudo sh -c 'echo "deb [arch=amd64] http://dl.google.com/linux/chrome/deb/ stable main" >> /etc/apt/sources.list.d/google.list'
sudo apt-get update
sudo apt-get install google-chrome-stable
The final install is the xvfb package (X virtual framebuffer) which makes the magic happen (a big thanks goes to Chris Holt the Canopy author who gave me the information that this tutorial is based on).
sudo apt-get install xvfb
Now with everything in place we can setup a test. First install the required nuget packages.
nuget install canopy -excludeVersion -outputdirectory packages
rm -r packages/Selenium.WebDriver
nuget install selenium.webdriver -excludeVersion -version 3.0.0 -outputdirectory packages
You'll notice in the second line above the Selenium.WebDriver package is removed. This is because there is an issue with version 3.0.1 (the latest at the time of writing) and version 3.0.0 is required in order for Canopy to work (this is the version used with the CanopyStarterKit).
Then create a simple test file. The file will simply check the h1 tag displays the correct text on the home page and about page of this website.
First create the file.
vi canopy.fsx
Then paste the contents below into the file and save with !wq.
#r "./packages/Selenium.WebDriver/lib/net40/WebDriver.dll"
#r "./packages/canopy/lib/canopy.dll"

open canopy
open runner

canopy.configuration.chromeDir <- "."

start chrome

"Should check home page h1" &&& fun _ ->
  url "http://coderscoffeehouse.com/"

  "h1" == "Coder's Coffee House"

"Should check about page h1" &&& fun _ ->
  url "http://coderscoffeehouse.com/about"

  "h1" == "About"

run()

quit()
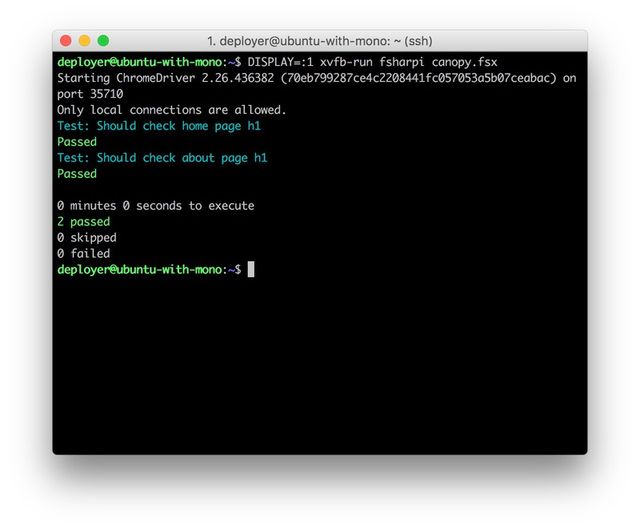
I was then able to run the following.
DISPLAY=:1 xvfb-run fsharpi canopy.fsx
And the result was the following.

This is a pretty rudimentary example but it's all the information you need if you want to include headless testing in your CI build. Any comments please leave below, thanks :-)