TeamCity Linux Setup
2017-04-07
Another one in my .NET / Linux series :-)
So, TeamCity seems to be the de facto build server in the .NET world and we want install it on Linux. I thought this would be straightforward - after all it's written in Java which runs pretty well on Linux so I shouldn't have any problem. Well, I've got it running but it's not as simple as I'd hoped so here are the steps you'll need to go through.
For this exercise I created a new VM running Ubuntu 16.04.2 LTS with nothing installed.
Install Java
Add the package repository and install.
sudo add-apt-repository ppa:openjdk-r/ppa
sudo apt-get update
sudo apt-get install openjdk-8-jre
Check Java is installed with the following.
java -versionYou should see something like the following in the terminal.
openjdk version "1.8.0_121"Setup MySQL
TeamCity comes bundled with a Java based database called HSQLDB but it supports all the major RDBMS systems. I'm going to use MySQL here. So the next step is to install it.
sudo apt-get update
sudo apt-get install mysql-server
Check it's installed.
mysql --versionYou should see some like the following in the terminal.
mysql Ver 14.14 Distrib 5.7.17, for Linux (x86_64)Login to MySQL and create the database and user.
create database teamcity collate utf8_bin;
create user teamcity identified by 'password';
grant all privileges on teamcity.* to teamcity;
grant process on *.* to teamcity;
Install TeamCity
Move to the opt folder as that's where we're going to install TeamCity (I'm just following convention here).
cd /optDownload and extract the TeamCity package.
sudo wget https://download-cf.jetbrains.com/teamcity/TeamCity-10.0.2.tar.gz
sudo tar -xzvf TeamCity-10.0.2.tar.gz
There should now be an /opt/TeamCity directory. Create an application user and set the appropriate permissions.
sudo useradd teamcity
sudo chown -R teamcity:teamcity /opt/TeamCity
Create the service
This is simple enough. Create the service file.
sudo vim /etc/init.d/teamcityCopy and paste the following then save the file.
export TEAMCITY_DATA_PATH="/opt/TeamCity/.BuildServer"

case $1 in
  start)
    echo "Starting Team City"
    start-stop-daemon --start  -c teamcity --exec /opt/TeamCity/bin/teamcity-server.sh start
    ;;
  stop)
    echo "Stopping Team City"
    start-stop-daemon --start -c teamcity  --exec  /opt/TeamCity/bin/teamcity-server.sh stop
    ;;
  restart)
    echo "Restarting Team City"
    start-stop-daemon --start  -c teamcity --exec /opt/TeamCity/bin/teamcity-server.sh stop
    start-stop-daemon --start  -c teamcity --exec /opt/TeamCity/bin/teamcity-server.sh start
    ;;
  *)
    echo "Usage: /etc/init.d/teamcity {start|stop|restart}"
    exit 1
    ;;
esac

exit 0
Register as a startup script.
sudo update-rc.d teamcity defaultsMake the file executable.
sudo chmod +x /etc/init.d/teamcityAnd start the service.
sudo serivce teamcity startNow if you browse to the IP address of your server using port 8111 you should see the TeamCity web interface.
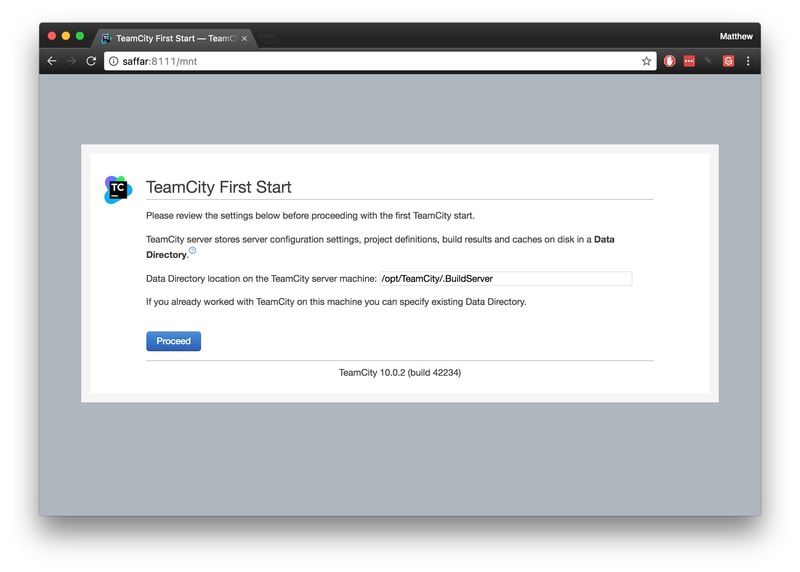
Here you're prompted to enter where you want your data directory. The convention seems to be within your installation which is what I've gone with here.
Click proceed and then you'll be prompted to fill out the details for the database. You don't need to fill in the host if you've done a local installation as we have in this tutorial (this screenshot was taken for another installation I have).
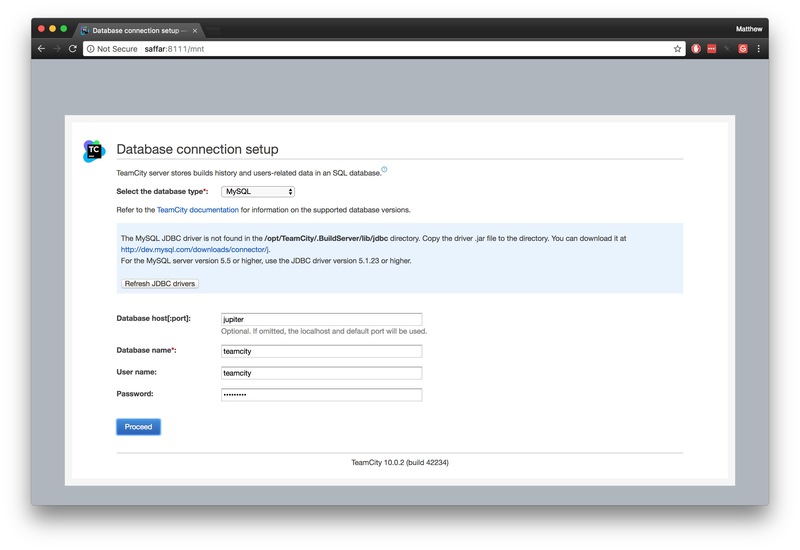
At this point if you fill out the details and click Proceed you'll get an error.
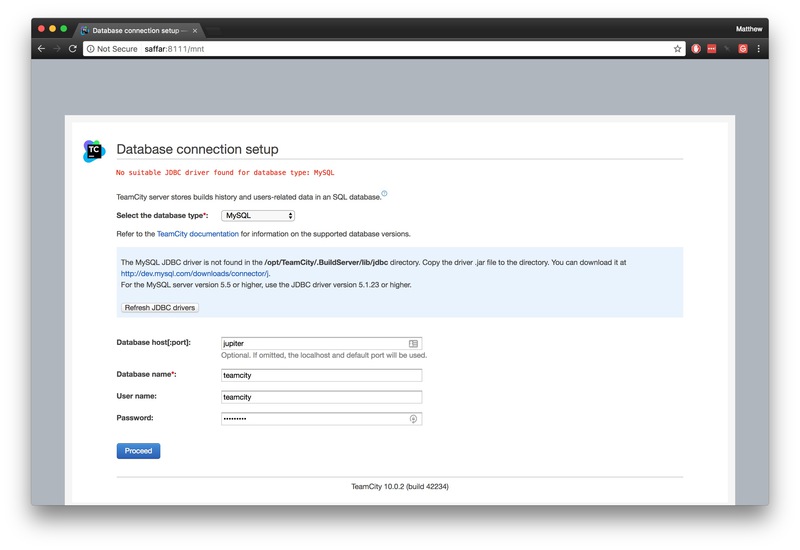
Unfortunately this is because the Java MySQL connector needs to be installed. But this was still a useful exercise as the data directory and some of the system files were created during this process. And this was needed as we are going to put the connector in one of these directories.
First stop the service.
sudo service teamcity startMove to opts directory if you're not there already.
cd /optDownload the MySQL Java connector and extract the package.
sudo wget http://dev.mysql.com/get/Downloads/Connector-J/mysql-connector-java-5.1.40.tar.gz
sudo tar -xzvf mysql-connector-java-5.1.40.tar.gz
Move the file to the required destination.
sudo mv /opt/mysql-connector-java-5.1.40/mysql-connector-java-5.1.40-bin.jar /opt/TeamCity/.BuildServer/lib/jdbc/We'll need to set permissions so the file runs under the teamcity account we created earlier.
sudo chown teamcity:teamcity /opt/TeamCity/.BuildServer/lib/jdbc/mysql-connector-java-5.1.40-bin.jarStart the service again.
sudo service teamcity startNow open a browser and fill out the MySQL details as before then click Proceed. At this point you might want to go and make a cup of tea or take the dog for a walk - it really can take some time and you might think it's crashed. Eventually you'll come to the license agreement page. Tick the accept check box and click Continue.
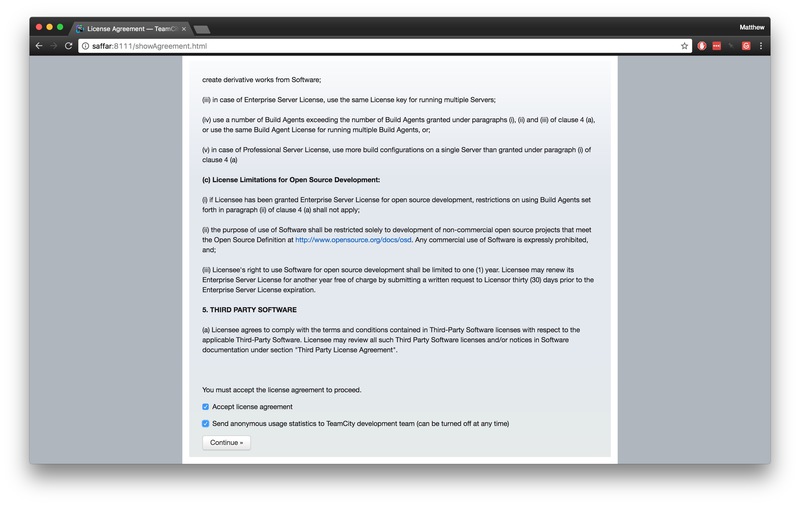
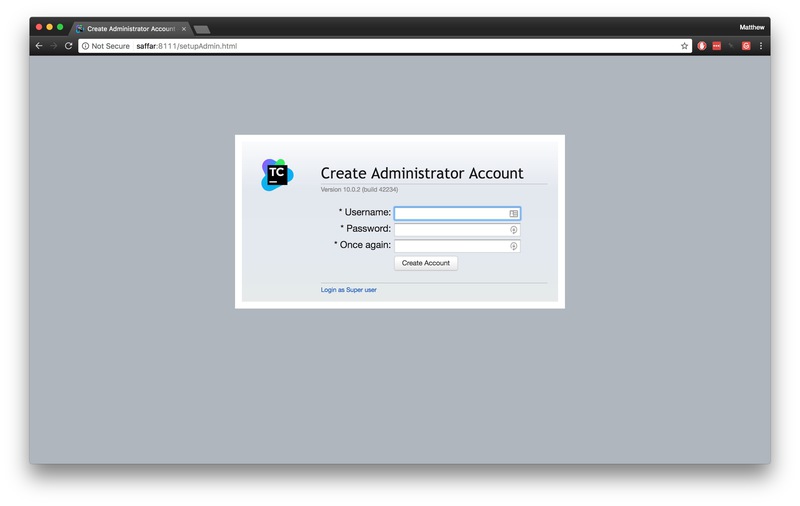
Proceed and create an admin account and you're good to go.
Setup nginx
The next step is optional but pretty straightforward enough. We're going to install nginx so we can browse using port 80.
First install nginx as so.
sudo apt-get install nginxThen create the config file for the site.
sudo vim /etc/nginx/sites-available/teamcityPaste the following in - swap intercrus in the example below for whatever your domain name is.
map $http_upgrade $connection_upgrade {
    default upgrade;
    ''   '';
}

server {

    listen       80;
    server_name  localhost intercrus;

    proxy_read_timeout     1200;
    proxy_connect_timeout  240;
    client_max_body_size   0;

    location / {

        proxy_pass          http://localhost:8111/;
        proxy_http_version  1.1;
        proxy_set_header    X-Forwarded-For $remote_addr;
        proxy_set_header    Host $server_name:$server_port;
        proxy_set_header    Upgrade $http_upgrade;
        proxy_set_header    Connection $connection_upgrade;
    }
}
Create a symlink for the new site.
sudo ln -s /etc/nginx/sites-available/teamcity /etc/nginx/sites-enabled/teamcityRestart the nginx service.
sudo service nginx restartNow if you browse to the same address under port 80 you should see the login page as shown below.
)
A couple of final points.
-
There's a serious issue with the startup time of TeamCity as explained here. I've found once it's up it's 'okay' but I think you really need a decent spec machine to run it on in a production environment.
-
I had some real issues with the MySQL installation. I haven't documented it here as it's somewhat out the scope of this tutorial but it seems to be a problem with the latest version of Ubuntu - it's probably best to direct the package directly when doing an installation.
That's it :-)
Links ...
http://blog.fire-development.com/2014/09/23/teamcity-8-setup-on-linux/ http://ubuntuhandbook.org/index.php/2015/01/install-openjdk-8-ubuntu-14-04-12-04-lts/ https://confluence.jetbrains.com/display/TCD9/Setting+up+an+External+Database https://gist.github.com/sandcastle/9282638
UPDATE 2017-04-19
Build Agent
One step I missed last time was setting up the build agent. I realised this when I went to use TeamCity earlier! The relevant section on the TC website is here but the details are included here for completeness.
Navigate to the services start/stop services scripts directory.
cd /etc/init.d/Open the build agent service script.
sudo vim buildAgent
Paste the following into the file.
#!/bin/sh
### BEGIN INIT INFO
# Provides:          TeamCity Build Agent
# Required-Start:    $remote_fs $syslog
# Required-Stop:     $remote_fs $syslog
# Default-Start:     2 3 4 5
# Default-Stop:      0 1 6
# Short-Description: Start build agent daemon at boot time
# Description:       Enable service provided by daemon.
### END INIT INFO
#Provide the correct user name:
USER="agentuser"

case "$1" in
start)
 su - $USER -c "cd BuildAgent/bin ; ./agent.sh start"
;;
stop)
 su - $USER -c "cd BuildAgent/bin ; ./agent.sh stop"
;;
*)
  echo "usage start/stop"
  exit 1
 ;;

esac

exit 0
Set the permissions to execute the file.
sudo chmod 755 buildAgent
Make links to start the agent service on the machine boot and on restarts using the appropriate tool.
sudo update-rc.d buildAgent defaults
macOS Users
If you're a macOS user you can get the build agent on your own system to run automatically by creating a plist file in /Library/LaunchDaemons. The instructions for doing so are here.
I did run into a few 'gotchas'.
Make sure you set the correct permissions
sudo chown -R root:wheel path-to-agent-on-your-mac/buildAgent
Copy the following file.
buildAgent/conf/buildAgent.dist.propertiesTo the same directory with the following name.
buildAgent/conf/buildAgent.propertiesImport the certificate
Another issue I found was the agent becoming disconnected after adding self-signed https certificate. I found the answer here on StackOverflow.
sudo keytool -importcert -file ~/Desktop/certificate-name.cer -keystore /Library/Java/JavaVirtualMachines/jdk1.8.0_101.jdk/Contents/Home/jre/lib/security/cacertsThere might be a password to enter which unless changed will be changeit (as explained in the SO answer).
Remember to start the agent.
./bin/agent.sh start