DotNet Test With NUnit
I wrote a post a few weeks ago Exploring The DotNet Command about ... well anyway one of the commands mentioned was the test command which is what this post is about.
There's some info on this in the official docs here with a few examples. To find out a list of the available switches (and their description) to use with test just type dotnet test --help. For example to list the available tests using the --list-tests switch run the following in your terminal:
dotnet test --list-testsThe following is a more complicated example: run all tests using a settings file, under release without building the project:
dotnet test --settings appsettings.json --configuration release --no-buildAll good so far but as mentioned in the post I refer to at the start, I like to use NUnit and the only examples in the offical docs are for xUnit (which seems to be the new hotness) and MSTest. For the most part there aren't many differences to how you use the test command with each framework except for when using filters.
Filters
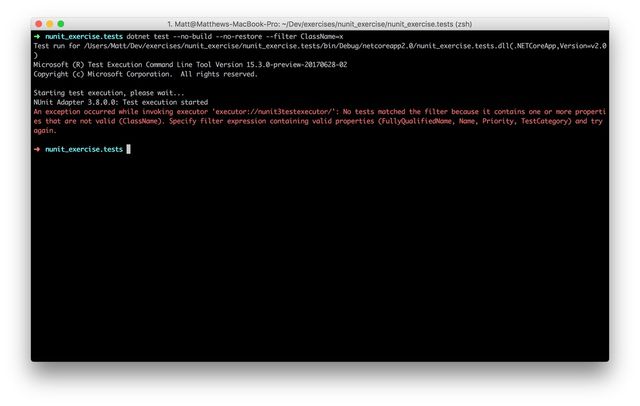
Filters are useful because they allow you to run specific tests rather than the whole test suite. I couldn't find any listings of the available NUnit filters so I decided to have a guess by running the following:
dotnet test --filter Hello=xThis printed out the following:

Which tells us the available filters are FullyQualifiedName, Name, Priority and TestCategory. The available operators are listed in the official docs and they are = (equals), != (does not equal) and ~ (contains) with both | (or) and & (and) for more complicated scenarios.
Examples
We'll use the following test case for our examples:
using NUnit.Framework;

namespace nunit_exercise
{
  public class Tests
  {
    [Test]
    [Category("Foo")]
    public void Test1()
    {
      Assert.Pass();
    }

    [Test]
    public void Test2()
    {
      Assert.Pass();
    }

  }
}
Running an individual test is pretty straightforward, you can use the Name filter like so:
dotnet test --filter Name=Test1The Category filter is probably the simplest way to group tests. The filter corresponds to the attribute of the same name which can be used at either the class or method level (as shown in the example below). So to run all tests under Foo execute the following:
dotnet test --filter TestCategory=FooThis is great but I don't use Category myself but wanted a convenient way to group tests without having to add unwanted attributes to my test cases. I found the best way to do this is to use the FullyQualifiedName filter and the ~ (contains) operator. I could also use the Name filter but it might be you have test methods of the same name in different classes. To run the tests in the Tests class from the our above example execute the following:
dotnet test --filter FullyQualifiedName~nunit_exercise.TestsBasically after the ~ operator type the value namespace.className. You can filter this down further if you wish using the name (you might only want to run certain tests in one class for example) which would follow the rule namespace.className.StartOfTestName. For example the following will also run all tests in the Tests class:
dotnet test --filter FullyQualifiedName~nunit_exercise.Tests.TestThis includes all tests in the class prefixed with Test so if another test is added that doesn't start the same it won't be included.
That's it for this one! Here's some further reading on using filters :-)