WordPress With Tailwind Made Simple
Embracing WordPress
Anyone acquainted with web development knows about the ubiqity of WordPress. Finding every other website I visit being powered by the platform I've decided to embrace it recently. This website will still be powered by Eleventy but I will likely go down the WordPress route from now on.
But a benefit of Eleventy and other static frameworks is ease of use. WordPress isn't aimed at developers but business users and the workflow has taken a bit of getting used to. The main challenge for me was getting a workflow working with Tailwind. My approach does not adhere to WordPress 'best practices' and seasoned Pressers (if that is what they are called) will know a better way. This is what works for me and is likely the best way for anyone else new to the platform using Tailwind.
Underscore Theme
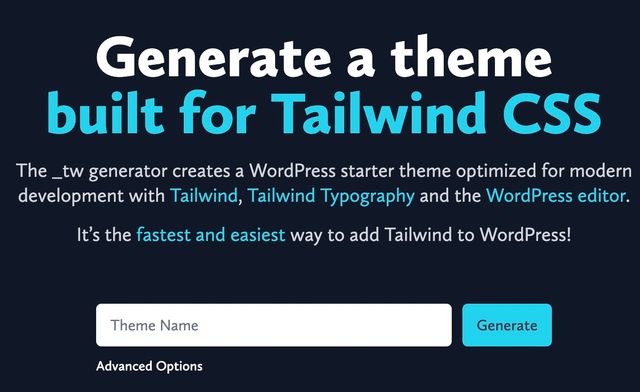
Using Tailwind with equires a pretty bare bones WordPress theme. I did try the 'vanilla' method by reading the official docs on theming (something you should definitely do) but after a bit of digging I found the Underscore project was the best way to go. It's theme template to build upon and is a great place to start. Being unfamiliar with WordPress I wasn't sure how I would get it to play with Tailwind but fortunately there is a Tailwind specific port of Underscore which you can get here.

Just enter a something in the 'Theme Name' field, click 'Generate' and a Tailwind optimised Underscore theme will be downloaded.
Copy the theme to the WordPress themes folder, the path will be similar to that below:
wordpress_site_name/wp-content/themes/new_theme_nameFinally for this step open a terminal window and cd to the new theme's folder (as shown above) as we'll be doing some work in here.
Optional Additional Steps
The following only applies if your theme was created from an existing Underscore theme by copying and pasting the .zip file (you might want to do this rather than visit the Underscore website each time).
-
Rename the
.zipfile to the name of your new theme (if necessary). -
Make the necessary changes to the
.phpfiles by changing@package DefaultThemeNameto@package new_theme_name. -
Make the necessary changes to the
style.css. ChangeTheme Name: DefaultThemetoTheme Name: new_theme_nameand changeText Domain: DefaultThemetoText Domain: new_theme_name.
Install Dependencies
Next install the dependencies listed in the package.json file. I actually hit an issue here and it may be because I use the pnpm package manager and not npm (for good reasons, pnpm uses symlinks and doesn't polute your drive with unnecessary bloat). To get round this I had to install a few libraries first:
pnpm install --save-dev @babel/core eslint typescript
pnpm install
It might be a simple npm install works fine but the above is what worked for me. Then run the development build:
pnpm run devLive Reload
This is optional if you want a live reload experience so changes can be seen instantly in the browser. I use a global install of browser-sync which you install like so:
pnpm install -g browser-syncThen edit the footer.php file which is located in the following location:
wordpress_site_name/wp-content/themes/new_theme_name/theme/footer.phpAdd the following script before the closing </body> tag near the bottom of the file:
<script id="__bs_script__">//<![CDATA[
    document.write("<script async src='http://HOST:3000/browser-sync/browser-sync-client.js?v=2.27.10'><\/script>".replace("HOST", location.hostname));
//]]></script>
Edit Hosts File
If you're not using Browsersync this step may not apply. That said WordPress stores links in the database and using something other than localhost isn't a bad idea. To do this edit your machine's hosts file which on a unix based system is located:
/etc/hostsAdd something like the following:
127.0.0.1 tw-wpTo use Browsersync and Tailwind together we need to proxy the WordPress server and it will not work unless the steps above are taken.
Run Everything Together
That's everything now to run it all together.
From the main WordPress installation folder start the PHP server with the correct host:
wp server --host=tw-wpNavigate to the theme folder and start watching the files:
pnpm watchFrom the same theme folder run browser-sync with the correct arguments:
browser-sync start --proxy 'tw-wp:8080' --files '**/*' --no-notifyNow change some of the CSS in the index.php file (or any PHP you fancy) hit the save key and watch the resulting Tailwind CSS appear in the browser.